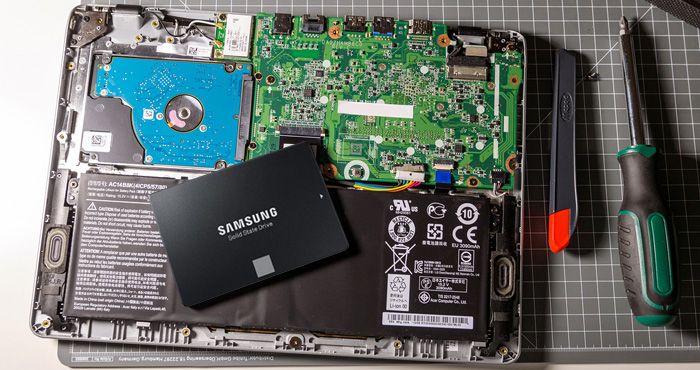
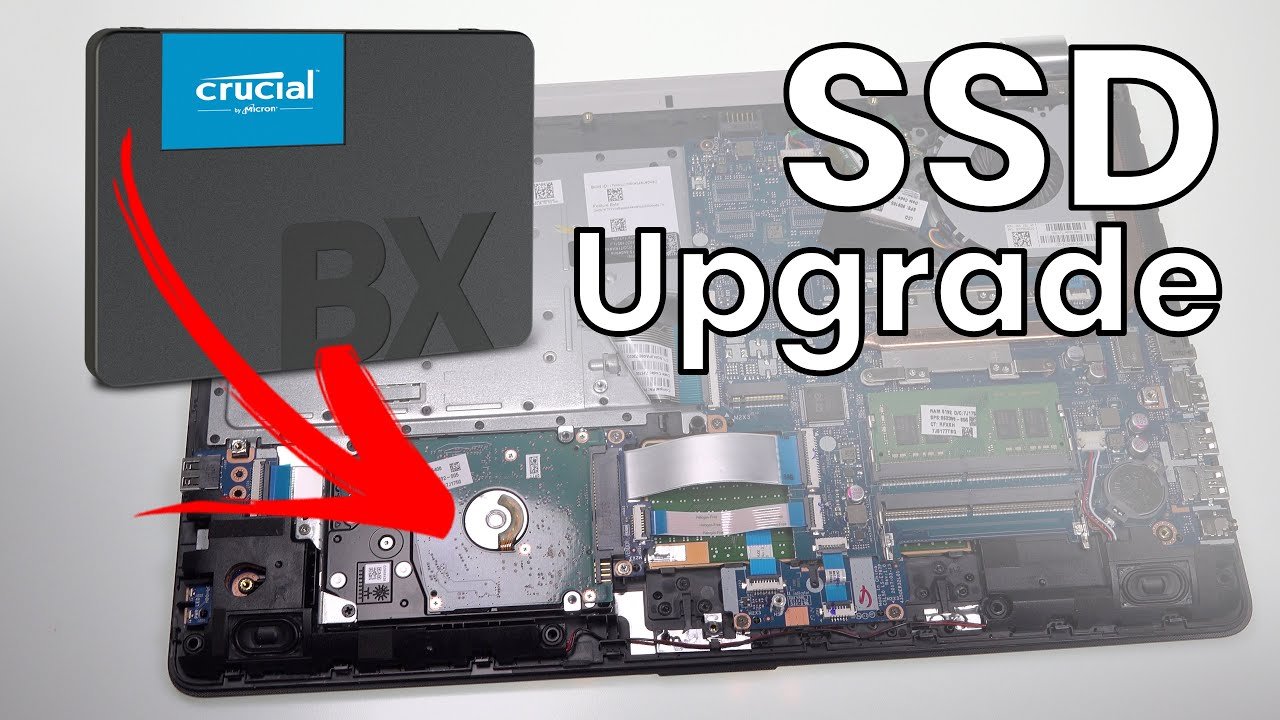
To replace an SSD, power off your device and remove the back cover. Next, unscrew the old SSD and carefully insert the new one.
Replacing an SSD can significantly enhance your device’s performance and storage capacity. Solid State Drives offer faster data access and improved reliability compared to traditional hard drives. Over time, your SSD may become full or slow down, necessitating a replacement.
Upgrading is a straightforward process that most users can manage with minimal tools. This guide will walk you through the steps for a successful SSD replacement, ensuring your system runs smoothly. Whether you’re a tech enthusiast or a casual user, this process can breathe new life into your computer or laptop. Let’s dive into the details!
Introduction To Ssd Upgrades
Upgrading to a Solid State Drive (SSD) can transform your computer’s performance. SSDs are faster and more reliable than traditional hard drives. This section explores the reasons to upgrade and the benefits SSDs offer.
Why Upgrade To An Ssd?
Upgrading to an SSD is a smart choice for many users. Here are some key reasons:
- Speed: SSDs boost boot and load times.
- Durability: SSDs have no moving parts, reducing failure risks.
- Energy Efficiency: SSDs consume less power, extending battery life.
- Noise Reduction: SSDs operate silently, improving user experience.
Benefits Of Ssd Over Hdd
Comparing SSDs with traditional Hard Disk Drives (HDDs) highlights many advantages. The table below summarizes key differences:
| Feature | SSD | HDD |
|---|---|---|
| Speed | Very fast | Slower |
| Durability | High | Low |
| Noise | Silent | Noisy |
| Weight | Lightweight | Heavier |
| Price | More expensive | Less expensive |
Understanding these benefits helps users make informed decisions. Upgrading to an SSD enhances your computing experience significantly.

Credit: www.techlicious.com
Identifying Your Current Storage
Knowing your current storage type is vital. It helps in choosing the right SSD. Different devices require different storage solutions. This section will help you identify your storage.
Types Of Storage Devices
There are several types of storage devices:
- Hard Disk Drives (HDD) – Traditional spinning disks.
- Solid State Drives (SSD) – Faster, no moving parts.
- M.2 Drives – Compact, high-speed SSDs.
- External Drives – Portable storage options.
Each type has unique features. Understanding these helps in making the right choice.
How To Know Your Storage Type
Finding out your current storage type is simple. Follow these steps:
- Open your computer.
- Click on “This PC” or “My Computer”.
- Right-click on the drive you want to check.
- Select “Properties”.
A window will pop up, showing your drive details. Look for the drive type:
| Drive Type | Description |
|---|---|
| HDD | Large storage capacity, slower speeds. |
| SSD | Fast performance, more reliable. |
| M.2 SSD | Small form factor, very fast. |
Check the drive’s label or specifications. This information confirms your storage type.
Choosing The Right Ssd
Choosing the right SSD can greatly improve your computer’s performance. With many options available, it’s essential to understand what to consider. This section covers key specifications and compatibility issues.
Ssd Specifications To Consider
Several specifications determine SSD performance. Here are the most important ones:
- Storage Capacity: Available in sizes like 256GB, 512GB, and 1TB.
- Form Factor: Common types include 2.5-inch, M.2, and PCIe.
- Read/Write Speed: Measured in MB/s; faster speeds equal better performance.
- Endurance: Measured in TBW (Terabytes Written); higher TBW means better durability.
- Warranty: Check the warranty period; longer is often better.
| Specification | Details |
|---|---|
| Storage Capacity | 256GB, 512GB, 1TB, 2TB |
| Form Factor | 2.5-inch, M.2, PCIe |
| Read/Write Speed | Up to 7000 MB/s for PCIe |
| Endurance | 150 TBW to 600 TBW |
| Warranty | 3 years to 5 years |
Compatibility With Your System
Ensure the SSD is compatible with your device. Follow these steps:
- Check the device manual for supported SSD types.
- Identify your current SSD’s form factor.
- Verify the motherboard’s M.2 slot or SATA port.
- Consider the operating system; some older OS may have issues.
Compatibility avoids installation headaches. Take the time to research. This ensures a smooth upgrade.
Preparing For Ssd Installation
Preparing for your SSD installation is crucial. Proper steps ensure a smooth transition. Follow these guidelines to set yourself up for success.
Backup Your Data
Backing up your data is the first step. You don’t want to lose important files. Follow these steps to back up your data:
- Connect an external hard drive or USB drive.
- Open your file explorer.
- Select files and folders you want to save.
- Copy them to the external drive.
Consider using cloud storage as an alternative. Popular options include:
- Google Drive
- Dropbox
- OneDrive
Always check that your backup is complete. Verify files are accessible before proceeding.
Gather Necessary Tools
Gathering the right tools is essential for SSD installation. Here’s a list of what you need:
| Tool | Purpose |
|---|---|
| Screwdriver | To open your computer case. |
| Anti-static wrist strap | To protect components from static electricity. |
| SSD | Your new storage device. |
| Data cable | To connect the SSD to your motherboard. |
Ensure all tools are within reach. This will make the installation process easier.
Step-by-step Ssd Replacement
Replacing your SSD can boost your computer’s performance. Follow these simple steps for a smooth upgrade. Make sure to back up your data before starting. You will need basic tools for the job.
Removing The Old Drive
Start by gathering your tools. You will need:
- Screwdriver
- Anti-static wrist strap
- New SSD
Now, follow these steps:
- Turn off your computer and unplug it.
- Open the case. Check your computer’s manual for guidance.
- Locate the old SSD. It is usually in the drive bay.
- Disconnect the cables from the old SSD.
- Unscrew the SSD from its mounting bracket.
- Carefully slide the old SSD out of the bay.
Installing The New Ssd
Now, it’s time to install your new SSD. Follow these steps:
- Align the new SSD with the mounting bracket.
- Screw the SSD into place securely.
- Reconnect the cables to the new SSD.
- Close the computer case.
- Plug in your computer and turn it on.
Check if the new SSD is recognized. Go to your computer’s settings to verify. Enjoy the speed boost from your new SSD!

Credit: wetech.co.za
Software Configuration
After physically replacing the SSD, configure the software. This step ensures the new SSD works smoothly. Proper setup is crucial for performance.
Formatting The New Ssd
Formatting prepares the SSD for use. Follow these steps:
- Open “Disk Management” on your computer.
- Locate the new SSD in the list.
- Right-click on the unallocated space.
- Select “New Simple Volume.”
- Follow the wizard to format the drive.
Choose the NTFS file system for best performance. Assign a drive letter for easy access. A formatted SSD is ready for use.
Operating System Installation
Install your operating system on the new SSD. This process varies by OS. Here are the general steps:
- Download the OS installation media.
- Create a bootable USB drive.
- Insert the USB drive into your computer.
- Restart and enter the BIOS/UEFI settings.
- Set the USB drive as the first boot option.
Follow the installation prompts. Choose the new SSD as the installation location. Complete the setup to finish.
Now, enjoy faster speeds and better performance with your new SSD!
Final Touches And Performance Testing
After replacing your SSD, it’s time for the final touches. These steps ensure your new drive works perfectly. Performance testing helps you check its speed and efficiency. Let’s dive into the essential tasks for a smooth experience.
Ensuring Proper Ssd Function
Start by making sure your SSD is recognized by your system. Follow these steps:
- Open your computer’s BIOS settings.
- Check if the new SSD appears in the storage section.
- Boot into your operating system.
If the SSD isn’t showing up, try these:
- Reconnect the SSD cables.
- Check for firmware updates.
- Look for any loose connections.
Once recognized, format the SSD. Right-click on it in your file explorer. Select “Format” and follow the prompts. This prepares the drive for use.
Benchmarking Your New Ssd
Benchmarking shows how well your SSD performs. Use reliable tools like CrystalDiskMark or AS SSD Benchmark. Here’s how:
- Download and install a benchmarking tool.
- Open the program and select your new SSD.
- Run the benchmark tests.
Check the results. Key metrics include:
| Metric | What It Means |
|---|---|
| Sequential Read | Speed when reading large files. |
| Sequential Write | Speed when writing large files. |
| Random Read | Speed when accessing small files. |
| Random Write | Speed when writing small files. |
Compare your results with the SSD’s specifications. This helps determine if it performs as expected.

Credit: www.youtube.com
Frequently Asked Questions
How Do I Know If I Need An Ssd Upgrade?
Look for slow boot times, lagging applications, or insufficient storage space. These indicate it’s time for an SSD upgrade.
What Tools Do I Need To Replace An Ssd?
You typically need a screwdriver, an anti-static wrist strap, and cloning software for data transfer.
Can I Replace My Ssd Myself?
Yes, replacing an SSD is a straightforward process that many users can complete without professional help.
How Long Does It Take To Replace An Ssd?
The replacement process usually takes about 30 minutes to an hour, depending on your experience and system complexity.
Will I Lose Data When Replacing My Ssd?
Data loss can occur if you don’t back up your files. Always ensure you have a backup before starting the replacement.
Conclusion
Replacing your SSD can significantly enhance your device’s performance. Follow the steps outlined in this guide for a smooth process. Remember to back up your data before starting. With a little patience, you can enjoy faster load times and improved efficiency.
Upgrade your storage today for a better computing experience!
